


Are you in love by using emojis? With the brand Apple’s new Genmoji tool, you can take this fun part to the next level by creating and designing your own customized emoji! Whether you want an emoji that looks just like you or something completely unique avtaar, Genmoji makes it so easy. Additionally, if you find it difficult to use this fun feature, we can help resolve any issues and guide you on how to use Genmoji effortlessly.
Step 1: Make Sure Your iPhone is Updated
To use this amazing feature of Genmoji, you must have the latest Apple iOS update. Apple typically introduces new features through software updates regularly , so keeping your device up to date is very essential for using this feature.
To check for latest iOS updates:
- First go to Settings > General > Software Update.
- If there is any update available, tap Download and Install.
By updating the iPhone Now ensures you have access to Genmoji along with all the latest features. If your phone is already up to date, you don’t need to check this just skip this part
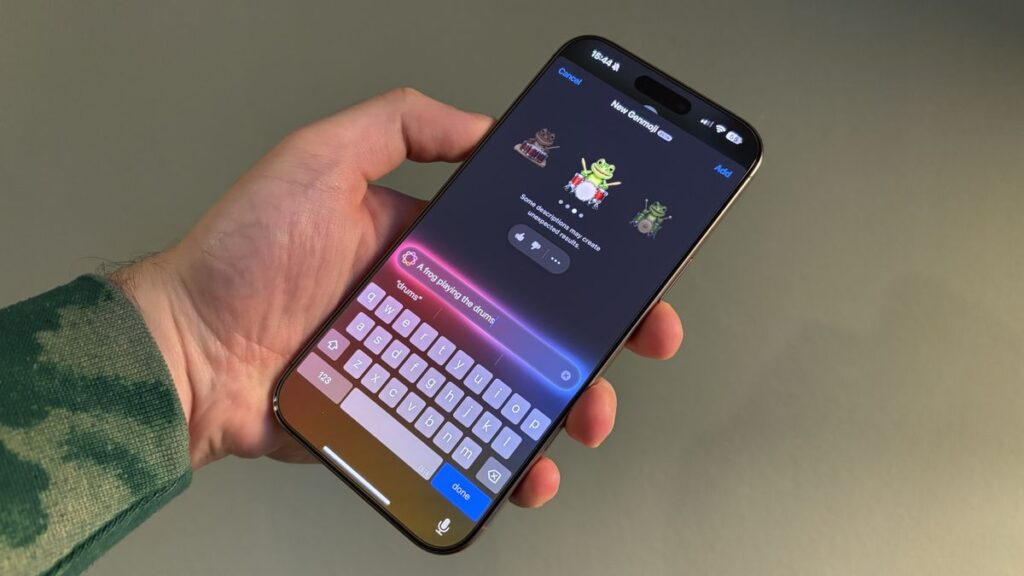
Step 2: Now Open Your Emoji Keyboard
Now that your phone is ready, it’s time to explore and check Genmoji!
How to use Genmoji & follow the steps carefully:
- First you have to open any app where you can type easily, for example while you are surfing the apps like Messages, Notes, or any social media app.
- Tap the emoji icon, usually located near the space bar on your keyboard.
- Look for the Genmoji option—it may appear as a “Create” button or a new tab.
- If you don’t see the Genmoji feature yet, try restarting your phone or waiting for Apple to roll out the update completely.
Step 3: Design Your Own Genmoji
Now comes the fun part for the query how to use Genmoji is —creating your personalized emoji! Use Genmoji to craft a look that truly represents you:
- Skin tone & face shape – There are many choices available to suit your image.
- Hairstyle & color – No matter if your hair is curly, straight, long or short, there are a lot of ways to style it.
- Facial features – Edit your eyes, eyebrows, nose, lips and, if you want, put beauty marks or freckles on your face.
- Accessories – You can wear glasses, hats, earrings, or have fun with other extras like piercings.
- Expressions – Some Genmoji can have different facial expressions to express different emotions.
Experiment with all the options until your Genmoji looks just the way you want. The possibilities are endless—so get creative!
Step 4: Start Using Your Genmoji in Chats
Once you’ve created your Genmoji, you can start using it right away!
Here’s how:
- Open an app where you can type and bring up your emoji keyboard.
- Your Genmoji should appear in a dedicated tab or in the “Recently Used” section.
- Tap your Genmoji to insert it into a message, just like any other emoji.
- For extra personality, send Genmoji stickers—larger, animated versions of your Genmoji. To drag and drop a Genmoji into a chat, simply press and hold it.
Now, have fun expressing yourself with your personalized Genmoji! 🎨✨
Step 5: Create or Edit New Genmojis
Want to make a new Genmoji or edit yours? No problem! Apple allows you to build multiple versions or easily update existing ones.
To create or edit a Genmoji:
- Open the Genmoji section on your emoji keyboard.
- To start fresh, tap “Create New”; to make changes, tap “Edit”.
You can make fun Genmojis for friends and family or even create different versions of yourself for various moods!
Step 6: Use Genmoji in Multiple Apps
Though Genmoji is primarily used in Messages, you can also incorporate it into other apps!
Hope this guide solve your How to use Genmoji query.

